Post by Deleted on Feb 23, 2013 16:08:41 GMT -5
Hey all,
Pam ended up going in to work today which freed me up to work on this tutorial that I felt might be of benefit. As I said in one of my posts yesterday, it's important when working with Flexi-Tubes to keep all of the scraps. While working with these tubes, I've found the following method quite beneficial as it helps to plan the fly, and acts as a guide to keeping the fly's proportions correct. Another benefit is that setting up a tube like this eliminates any step up, or step down and provides a uniform surface to tie your fly, the whole length of the tube. The various transitions along the tube (from plastic to steel weight, and back to plastic) act as markers to gauge the various segments of the fly. I'll apologize up front for the length of this post, and the poor quality of the photos. But this should give you an idea of what I'm talking about.
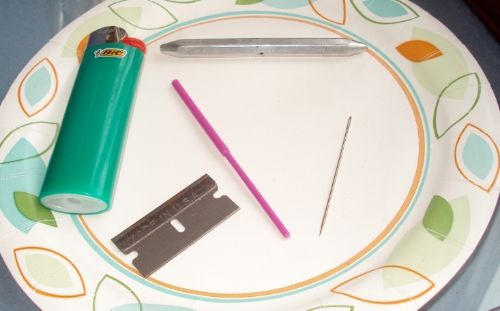
First, the materials and tools... Butant lighter, single-edged razor blade, sewing needle, half-hitch tool and one 40/40 (mm) Flexi-tube in your favorite flavor. I chose purple so it would be more visible.
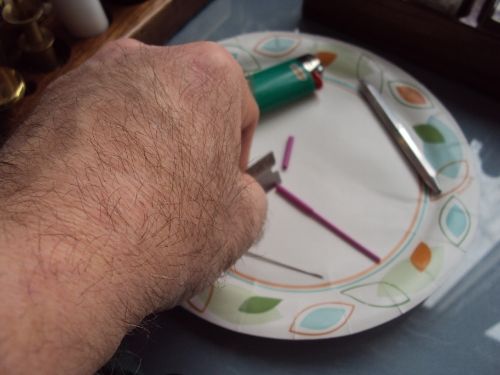
Step 1: Using you razor blace (makes a cleaner cut) trim the rear of the tube to the envisioned length you'll need. Here, I'm planning to tie a 3-4" Intruder that will have lead dumbell eyes.
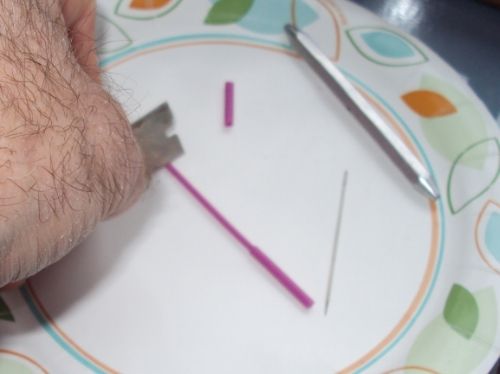
Step 2: Square up the front tip.
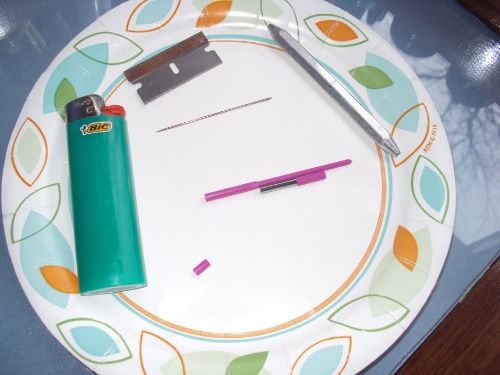
Step 3: Lay out the parts and trim the piece of scrap you'll use in the forward section of the tube. This will help you to envision at what points along the tube you'll need to be so you can avoid getting to the end of the tube and not having enough space to finish. Trim your scrap piece to the needed length (notice the small piece of scrap at the bottom of the photo).
Step 4: Place the Flexi-Tube on your vise-mounted needle, and slip the Flexi-weight sleeve onto the tube.
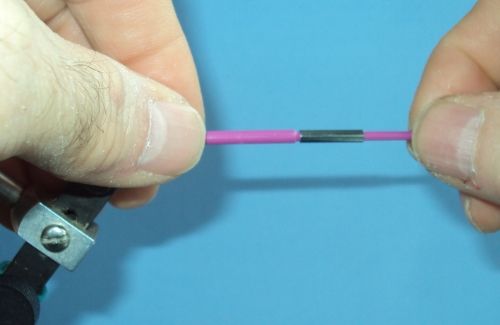
Step 5: Work the section of scrap that you've planned to use onto the tube. You'll need to keep that scrap piece within a half inch in length as it might be a little difficult to work down onto the smaller tip section. Work it down until the tip section protrudes a little from the scrap piece.
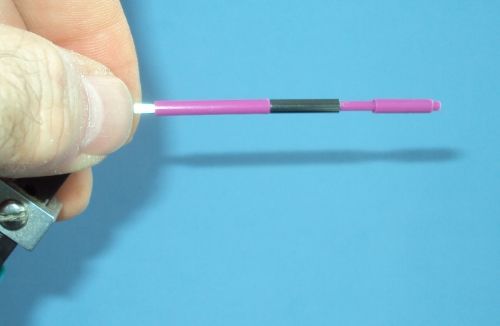
Step 6: Using your half-hitch tool, push the scrap and weight against the lip at the rear section of the tube, snugging everything up as much as possible.
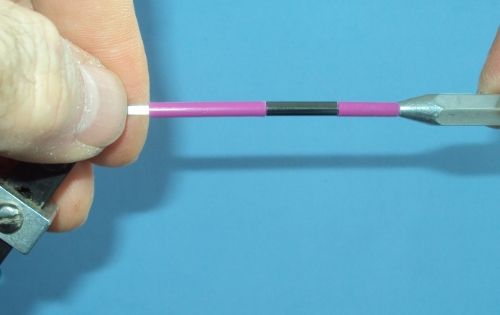
Step 7: Decision time... are you going to use a cone, turbo or sonic disc? If so, you'll want to start your thread in front of your scrap piece and spiral down to your planned starting point. NOTE: If you're going with cone, etc. the step created at the front of your scrap section can be used as a stop for the cone, or not. Just so long as you leave enough length in this forward section to melt the tube tip in front of the cone, etc. you'll be all set. You'll use the next three steps to accomplish that once your finished tying and apply the cone, etc.
But if your fly will end with a thread head, then you'll create a lip at the very front of the tube at this point. Recalling that I'm intending to use dumbell eyes and a dubbing looped rabbit head followed by a small whip finish just behind the lip that I'll create at this point. Here's the lip.
Pull the tube off the Flexi-Needle and hold it upright. Using a butane lighter, hold the blue part of the flame just above the tube tip and watch for the melting that will form a small lip. NOTE: You'll need to work quickly through this and the next two steps before the plastic cools.
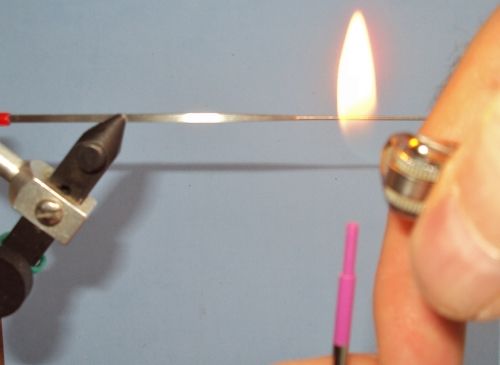
Step 8: Flatten the newly formed lip by pressing it into the side of the (hot) lighter's metal flame guard.
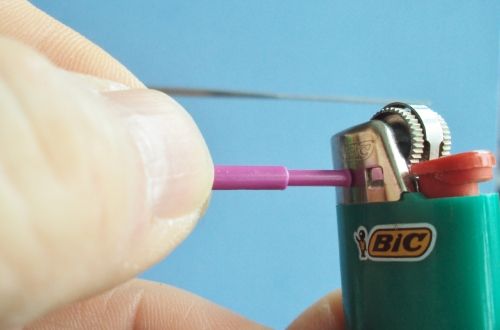
Step 9: Insert sewing needle into the tube tip's hole to keep it open. If it should have closed on you to some degree, heat up the needle and push it in to resoften the plastic and reopen the hole. Leave the needle in until the tube cools, then remove.
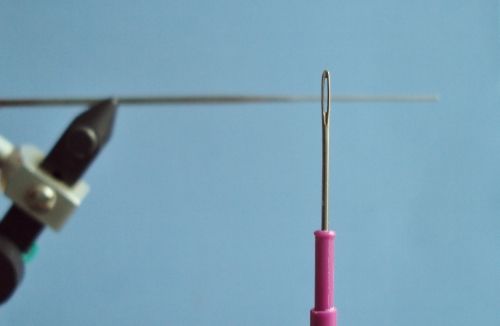
Step 10: Place your finished tube back onto the Flexi-needle.
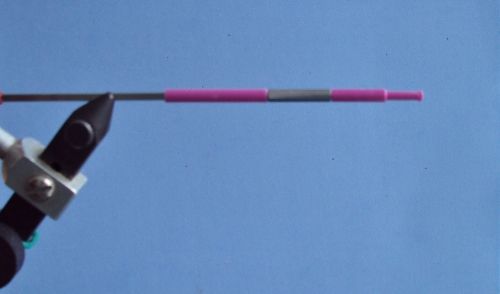
Step 11: Start your thread ahead of the front (scrap) section.
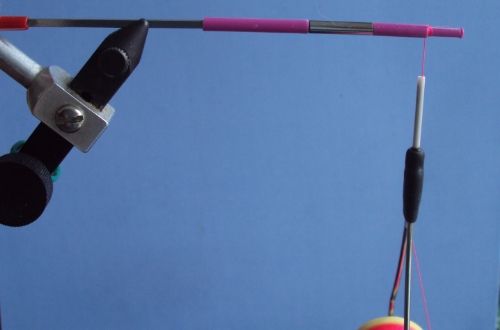
Step 12: Spiral down along the tube to where you'll begin. I'm planning to use Holo tinsel for a butt, so I've stop spiralling at the place where my butt will be, and layed a section of tight thread wraps that will help the tinsel by creating a less slippery surface.
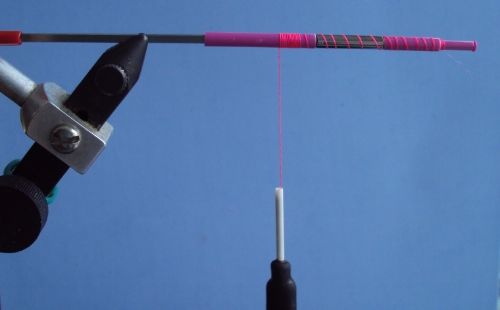
Finally, it's a good idea to to apply tight closely tied wraps of thread along the tube to bind down those loose spiral wraps and so lock everything together. So here you have it, hope this is a help. I've also got another little trick that I'll post in another thread. Happy tying...
FF
Pam ended up going in to work today which freed me up to work on this tutorial that I felt might be of benefit. As I said in one of my posts yesterday, it's important when working with Flexi-Tubes to keep all of the scraps. While working with these tubes, I've found the following method quite beneficial as it helps to plan the fly, and acts as a guide to keeping the fly's proportions correct. Another benefit is that setting up a tube like this eliminates any step up, or step down and provides a uniform surface to tie your fly, the whole length of the tube. The various transitions along the tube (from plastic to steel weight, and back to plastic) act as markers to gauge the various segments of the fly. I'll apologize up front for the length of this post, and the poor quality of the photos. But this should give you an idea of what I'm talking about.
First, the materials and tools... Butant lighter, single-edged razor blade, sewing needle, half-hitch tool and one 40/40 (mm) Flexi-tube in your favorite flavor. I chose purple so it would be more visible.

Step 1: Using you razor blace (makes a cleaner cut) trim the rear of the tube to the envisioned length you'll need. Here, I'm planning to tie a 3-4" Intruder that will have lead dumbell eyes.

Step 2: Square up the front tip.

Step 3: Lay out the parts and trim the piece of scrap you'll use in the forward section of the tube. This will help you to envision at what points along the tube you'll need to be so you can avoid getting to the end of the tube and not having enough space to finish. Trim your scrap piece to the needed length (notice the small piece of scrap at the bottom of the photo).

Step 4: Place the Flexi-Tube on your vise-mounted needle, and slip the Flexi-weight sleeve onto the tube.

Step 5: Work the section of scrap that you've planned to use onto the tube. You'll need to keep that scrap piece within a half inch in length as it might be a little difficult to work down onto the smaller tip section. Work it down until the tip section protrudes a little from the scrap piece.

Step 6: Using your half-hitch tool, push the scrap and weight against the lip at the rear section of the tube, snugging everything up as much as possible.

Step 7: Decision time... are you going to use a cone, turbo or sonic disc? If so, you'll want to start your thread in front of your scrap piece and spiral down to your planned starting point. NOTE: If you're going with cone, etc. the step created at the front of your scrap section can be used as a stop for the cone, or not. Just so long as you leave enough length in this forward section to melt the tube tip in front of the cone, etc. you'll be all set. You'll use the next three steps to accomplish that once your finished tying and apply the cone, etc.
But if your fly will end with a thread head, then you'll create a lip at the very front of the tube at this point. Recalling that I'm intending to use dumbell eyes and a dubbing looped rabbit head followed by a small whip finish just behind the lip that I'll create at this point. Here's the lip.
Pull the tube off the Flexi-Needle and hold it upright. Using a butane lighter, hold the blue part of the flame just above the tube tip and watch for the melting that will form a small lip. NOTE: You'll need to work quickly through this and the next two steps before the plastic cools.

Step 8: Flatten the newly formed lip by pressing it into the side of the (hot) lighter's metal flame guard.

Step 9: Insert sewing needle into the tube tip's hole to keep it open. If it should have closed on you to some degree, heat up the needle and push it in to resoften the plastic and reopen the hole. Leave the needle in until the tube cools, then remove.

Step 10: Place your finished tube back onto the Flexi-needle.

Step 11: Start your thread ahead of the front (scrap) section.

Step 12: Spiral down along the tube to where you'll begin. I'm planning to use Holo tinsel for a butt, so I've stop spiralling at the place where my butt will be, and layed a section of tight thread wraps that will help the tinsel by creating a less slippery surface.

Finally, it's a good idea to to apply tight closely tied wraps of thread along the tube to bind down those loose spiral wraps and so lock everything together. So here you have it, hope this is a help. I've also got another little trick that I'll post in another thread. Happy tying...
FF

 Have fun...